As an Amazon Associate, we earn from qualifying purchases. Some links on this site are affiliate links at no extra cost to you. Our recommendations are based on thorough research and editorial judgment.

5 Best Kick Drum Mic Placement Tips for Perfect Sound Every Time
To achieve perfect kick drum sound, start with a cardioid dynamic microphone positioned 1 to 3 inches from the drumhead, focusing on its sweet spot for rich low frequencies. Guarantee you maintain equidistance to avoid phase issues, and adjust the angle to enhance clarity while reducing unwanted noise. Experiment with placements inside and outside the drum for the desired tone, and consider room acoustics to minimize reflections. Stick around to discover more valuable tips for optimizing your kick drum sound!
Key Takeaways
- Position the cardioid dynamic mic 1 to 3 inches from the kick drum head for optimal sound capture of low frequencies.
- Experiment with mic placement inside the drum for isolation and to enhance the rich low-end sound around 150Hz.
- Maintain equidistance from drum and other instruments to avoid phase cancellation for a clear, balanced sound.
- Use boom arms for versatile positioning; set mic height at 1 to 3 inches above the drum head to capture deep bass tones.
- Assess room acoustics to minimize reflections by keeping the mic away from walls and avoid echo interference for better sound consistency.
| OnStage On-Stage MS7920B Amp and Bass Drum Short Microphone Stand |  | Compact Stability | Type: Microphone Stand | Color: Black | Weight: 6.4 Pounds | VIEW LATEST PRICE | Read Our Analysis |
| Drum Rim Microphone Clamp for Percussion Sets | 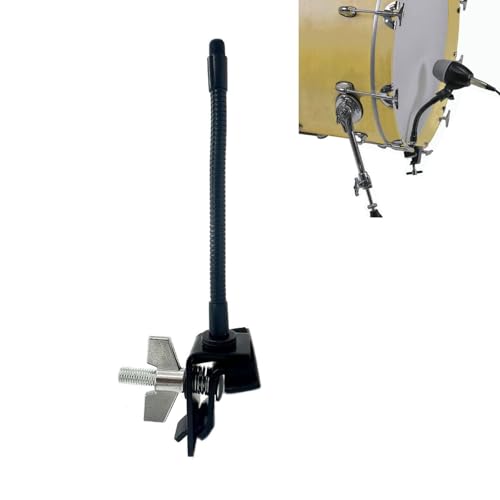 | Space-Saving Design | Type: Microphone Clamp | Color: Black | Weight: 5.76 Ounces | VIEW LATEST PRICE | Read Our Analysis |
| Ultimate Support JamStands KD55 Kick Drum Stand | 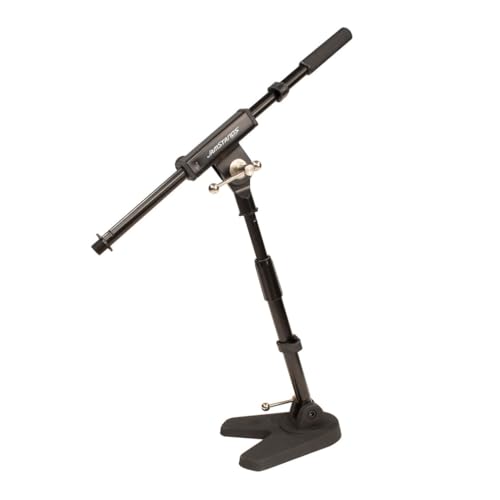 | Flexibility and Durability | Type: Kick Drum Stand | Color: One Color | Weight: 4.15 Pounds | VIEW LATEST PRICE | Read Our Analysis |
| Gibraltar Microphone Mount (SC-BDHMM) | 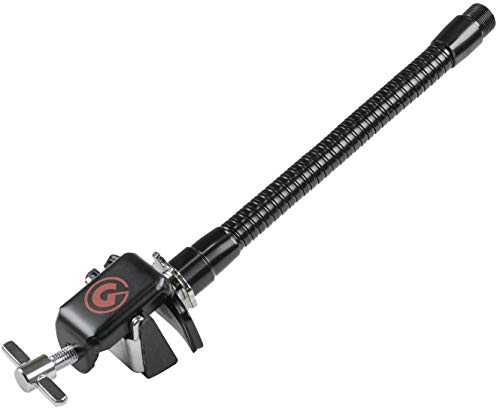 | Mic Stand Alternative | Type: Microphone Mount | Color: Black | Weight: 0.4 Kilograms | VIEW LATEST PRICE | Read Our Analysis |
| Phenyx Pro PDM33 Kick Drum Microphone | 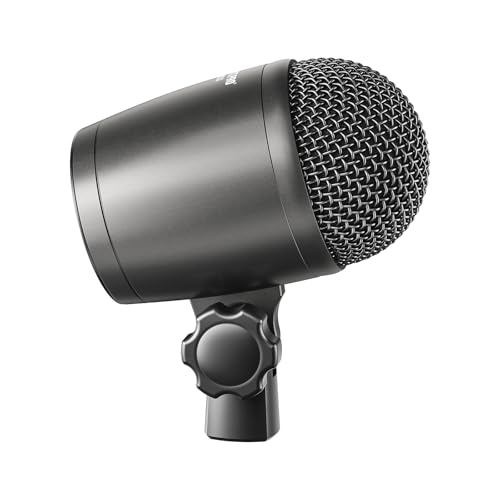 | Premium Sound Quality | Type: Kick Drum Microphone | Color: Grey | Weight: Approx. 1 Pounds (converted from metric) | VIEW LATEST PRICE | Read Our Analysis |
You may be interested


More Details on Our Top Picks
OnStage On-Stage MS7920B Amp and Bass Drum Short Microphone Stand
When it comes to mic placement for kick drums, the OnStage MS7920B Amp and Bass Drum Short Microphone Stand stands out as an ideal choice for musicians and sound engineers alike. Its compact U-shaped weighted base allows you to fit it easily into tight spaces without losing stability. Weighing just 6.4 pounds and made from durable alloy steel, it guarantees longevity and reliable support. With a 16-inch boom that rotates 320 degrees, you can adjust the mic’s position precisely. Plus, it disassembles into three sections, making it convenient for transport. This stand’s sleek black finish also matches any setup, providing a professional appearance.
- Type:Microphone Stand
- Color:Black
- Weight:6.4 Pounds
- Material:Alloy Steel
- Adjustability:Boom Angle Adjustment
- Portability:Disassembles for Storage
- Additional Feature:Compact U-shaped weighted base
- Additional Feature:Rugged diecast base construction
- Additional Feature:Ideal for streaming/podcasting
Drum Rim Microphone Clamp for Percussion Sets
For drummers looking to enhance their sound without cluttering their performance space, the Drum Rim Microphone Clamp is an excellent choice. It fits bass drum and tom drum edges up to 1.1cm thick, making it versatile for your setup. This black metal clamp is lightweight at just 5.76 ounces, yet it’s wear-resistant, ensuring durability over time. The flexible gooseneck allows for precise directional adjustments, optimizing sound capture. Its design features a tension rod that secures the microphone firmly, preventing any unwanted movement. While it adapts to standard sizes, you might need conversion screws for a perfect fit. It’s a thoughtful gift for any drummer!
- Type:Microphone Clamp
- Color:Black
- Weight:5.76 Ounces
- Material:Metal
- Adjustability:Flexible Gooseneck
- Portability:Compact Design
- Additional Feature:Flexible gooseneck adjustment
- Additional Feature:Tension rod design
- Additional Feature:Space-saving solution
Ultimate Support JamStands KD55 Kick Drum Stand
The Ultimate Support JamStands KD55 Kick Drum Stand is an excellent choice for musicians and sound engineers looking to achieve precise microphone placement during performances or studio recordings. This stand features a compact low-profile design, making it perfect for tight spaces in drum kits or amplifier setups. Its sturdy die-cast base guarantees maximum stability and durability, even during energetic performances. You’ll appreciate the precision angle adjustments that allow you to tailor the mic placement to your specific needs. With a flexible fixed boom arm, it offers additional reach for those tricky spots, making it a versatile tool for various applications.
- Type:Kick Drum Stand
- Color:One Color
- Weight:4.15 Pounds
- Material:Cast Iron
- Adjustability:Angle Adjustments
- Portability:Low-Profile
- Additional Feature:Low-profile design suitability
- Additional Feature:Precision angle adjustments
- Additional Feature:Flexible fixed boom arm
Gibraltar Microphone Mount (SC-BDHMM)
A must-have for drummers looking to elevate their sound without the hassle of mic stands, the Gibraltar Microphone Mount (SC-BDHMM) offers a sleek solution for micing your bass drum. This incredible mount clamps directly onto the front bass drum hoop, allowing you to secure your microphone effortlessly. Its deluxe hoop clamp, featuring a rubber guard, protects your drum while ensuring stability. With an 8-inch gooseneck, you can easily adjust the mic’s position to capture the perfect sound. Weighing only 0.4 kilograms, this compact mount enhances portability, making it a reliable and durable choice for drummers on the go.
- Type:Microphone Mount
- Color:Black
- Weight:0.4 Kilograms
- Material:Rubber
- Adjustability:Gooseneck Positioning
- Portability:Compact Design
- Additional Feature:Deluxe hoop clamp design
- Additional Feature:Rubber guard protection
- Additional Feature:Compact and portable design
Phenyx Pro PDM33 Kick Drum Microphone
Whether you’re an aspiring drummer or a seasoned sound engineer, the Phenyx Pro PDM33 Kick Drum Microphone shines as a top pick for capturing the essence of your bass drum sound. Designed specifically for kick drums, this cardioid dynamic mic excels at delivering rich lows around 150Hz while maintaining crisp articulation at 2kHz. Its robust metal housing guarantees it can withstand the rigors of live performances, and the built-in stand adapter makes setup a breeze. With a standard XLR connector, the PDM33 works seamlessly with various equipment, providing reliable sound quality and performance that inspires confidence for every session.
- Type:Kick Drum Microphone
- Color:Grey
- Weight:Approx. 1 Pounds (converted from metric)
- Material:Metal
- Adjustability:Cardioid Polar Pattern
- Portability:Sturdy Design for Setup
- Additional Feature:Tuned for kick drums
- Additional Feature:Handles high sound pressure
- Additional Feature:Built-in stand adapter
Factors to Consider When Choosing Kick Drum Mic Placement

When you’re setting up your kick drum mic, several key factors come into play that can really impact your sound. You’ll want to think about the type of mic you’re using, how you position it for the best clarity, and how to avoid any phase issues that might muddy the mix. Plus, considering room acoustics and employing isolation techniques can make a huge difference in capturing that punchy kick sound you crave.
Mic Type Selection
Selecting the right microphone for capturing the power of a kick drum is crucial to achieving the best sound quality in any music setup. A cardioid dynamic microphone, like the Phenyx Pro PDM33, excels at focusing on those rich low frequencies around 150Hz, which is fundamental for accentuating the drum’s punch. Make certain the microphone can handle high sound pressure levels without distortion; this guarantees clarity, even at high volumes. Opting for a cardioid pattern helps isolate the kick drum sound, effectively rejecting off-axis noise. Additionally, using a mounting solution, such as a drum rim clamp or mic mount, provides stability and flexibility in mic placement, allowing you to capture that perfect sound during performances.
Positioning for Clarity
Achieving clarity in your kick drum sound starts with smart mic placement. Position your microphone 1 to 3 inches away from the drumhead, focusing on the sweet spot where it captures the rich lows, especially around 150Hz. Adjust the microphone angle to minimize unwanted noise, allowing the kick drum’s attack and body to shine through clearly. Opt for a cardioid microphone pattern, which helps isolate the kick sound while reducing background noise. In tight setups, consider using a ducking and covering technique to enhance sound isolation. This thoughtful positioning not only boosts clarity but also guarantees that the kick drum stands out in the mix, making your recordings vibrant and impactful, perfect for any style of music.
Avoiding Phase Issues
To avoid phase issues in your kick drum recordings, it’s essential to understand how mic placement can affect sound quality. Position your mic equidistant from the kick drum to prevent phase cancellation, which can weaken your sound. Be mindful of the distance; if the mic’s placed too close, you’ll get a boomy tone, while setting it too far away may yield a thin signal. A cardioid polar pattern is your friend, as it concentrates on the kick sound while blocking out other instruments. Don’t hesitate to experiment with mic placement—try different positions both inside and outside the drum to discover how phase relationships influence your sound’s clarity. You can even monitor phase issues using audio software during sound checks!
Utilizing Isolation Techniques
While you’re setting up your kick drum for a recording session, considering isolation techniques can greatly enhance the overall sound quality. Start by placing your mic inside the kick drum, using isolation foam or padding to reduce unwanted noise from other instruments. This method effectively minimizes bleed, keeping your sound clean and focused. Secure the mic with clamps or mounts attached to the bass drum hoop to maintain stability and cut down on handling noise. Experiment with mic placement along the drumhead’s surface to discover the sweet spot where low-end frequencies and the attack of the beater work harmoniously. Additionally, opt for directional microphones with a cardioid pattern to capture the kick drum sound while rejecting background noise.
Consider Room Acoustics
When you’re setting up your kick drum mic, paying close attention to room acoustics can make a big difference in your recording quality. The sound captured by your mic is heavily influenced by the room’s features, like hard surfaces that can create unwanted reflections and reverberation. Be mindful of where the mic is positioned in relation to walls, windows, and other reflective materials, as these can muddy your bass response. Low ceilings can also cause sound waves to bounce back too quickly, so aim for a spacious environment. Consider adding acoustic panels or bass traps to reduce unwanted reflections. Finally, adjust the distance between the mic and the kick drum to achieve the best tonal balance while avoiding feedback problems.
Boom Arm Flexibility
A reliable boom arm is vital for achieving ideal kick drum mic placement, as it offers remarkable flexibility and control over your microphone’s positioning. You can adjust angles easily, enabling you to find the perfect spot to capture those rich low frequencies and tonal balance. Using a boom arm reduces the need for additional stands, which conserves space and minimizes clutter around your drum kit. Additionally, many boom arms come with heavy-duty clutches that guarantee secure height adjustments, keeping your mic stable during performances. Finally, the extension capability of a boom arm allows you to access hard-to-reach areas, providing thorough sound coverage without interference from other instruments. It’ll make a real difference in your overall sound quality!
Placement Height Recommendations
How do you choose the right height for placing your kick drum mic? Aim for a height between 1 to 3 inches above the drumhead. This range effectively captures low-frequency sounds without interference from the drum shell. Positioning the mic closer to the drum’s center amplifies those deep bass tones, whereas moving it toward the edge highlights defined attacks and higher frequencies. Keep in mind the drummer’s style; aggressive players might benefit from a higher mic to capture subtle nuances. Using a dynamic microphone with a cardioid pattern at slightly elevated heights can reduce unwanted noise from other instruments during live settings. Remember, experimenting with mic height during sound checks guarantees a perfect balance in your mix!
Experimenting With Angles
While many factors influence the sound quality of a kick drum mic, experimenting with angles can greatly enhance your audio capture. By tilting the microphone at a 30 to 45-degree angle, you can emphasize the kick’s attack while maintaining its low-end presence. This approach helps capture those essential bass frequencies, which are vital for a full sound. Using flexible gooseneck mics lets you easily reposition for ideal directional adjustments, making it simpler to find that sweet spot. Additionally, testing different angles helps minimize unwanted background noise, focusing on the kick drum while rejecting sounds from other instruments. Ultimately, these adjustments can noticeably influence the tonal balance, enhancing the overall audio fidelity in both live and studio settings.
Frequently Asked Questions
What Type of Microphone Is Best for Kick Drums?
For kick drums, dynamic microphones like the Shure Beta 52A or the AKG D112 are great choices. These mics handle high sound pressure levels and capture the deep thump of a kick drum perfectly. Alternatively, a condenser mic can work if you want more detail and clarity, but be careful with positioning. Ultimately, it’s about balancing durability and sound quality, ensuring you get that punchy sound you’re after during recording or live performances.
How Far Should the Mic Be From the Kick Drum?
You’ll want the mic about 2 to 6 inches away from the kick drum’s head. This distance helps capture that powerful thump while minimizing unwanted echoes. If you’re aiming for a more punchy sound, get closer, but if you prefer a fuller tone, pull it back a bit. Experiment with angles and distances—sometimes, the sweet spot can change based on your drum and room acoustics. Finding that perfect balance is key to great sound!
Can I Use a Dynamic Mic for a Kick Drum?
Yes, you can definitely use a dynamic mic for a kick drum. Dynamic microphones are great for capturing the punchy sound of the kick, especially when you place them close to the drum. They handle high sound pressure levels well and are built to endure loud environments, making them perfect for live settings. Just make sure to choose one with a good low-frequency response to really capture that deep thump you’re after.
Should I Angle the Mic Towards or Away From the Drum?
You should angle the mic slightly towards the kick drum for ideal clarity and presence. Positioning it this way captures the punchy attack while minimizing unwanted noise. If you aim it directly at the center, you’ll get a more booming sound, which might overwhelm the mix. Experimenting with positions will help you find that sweet spot. Remember, the mic’s distance from the drum also affects the sound, so adjust accordingly for that perfect balance.
What Effects Can Alter Kick Drum Sound During Recording?
You can use various effects to alter the kick drum sound during recording. For instance, equalization (EQ) helps boost or cut specific frequencies, shaping the drum’s tone. Compression tightens the sound, adding punch by controlling dynamic range. Reverb adds depth while distortion can create a grittier texture. Experimenting with these effects, you can enhance your kick drum’s character, ensuring it sits perfectly in the mix and resonates with energy in your music.


